
How to Make Red Wine Vinegar at Home (With Sulfite‑Free Wine and a Simple Mother)
Skip the sad pink stuff. Learn how to turn good sulfite‑free red wine into rich, ruby vinegar you can keep feeding and using in pan sauces, shrubs, and quick condiments.
This post contains affiliate links to products and books I genuinely use and love. If you buy through my links, I may earn a small commission as an Amazon Associate or through my affiliation with other retailers from qualifying purchases that you make at no extra cost to you.
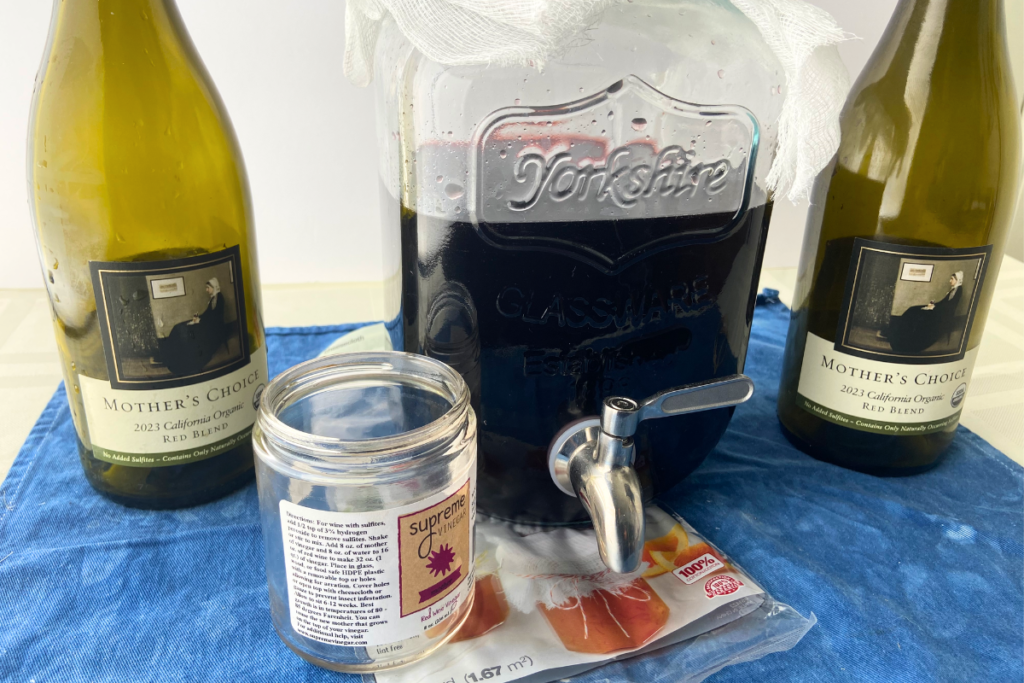
Homemade red wine vinegar is one of those quiet kitchen projects that can completely change how your food tastes with almost no effort and a small investment in equipment and time. However, if you’ve come here to discover how to create homemade red wine vinegar from left-over red wine, you’ve come to the wrong place.
First of all, I don’t think I’ve ever had red wine left over once I’ve uncorked or unscrewed the cap of a bottle of red wine. I’ve either finished it off in a glass with a meal or cheese plate or added it to a recipe to give my gravies, sauces, and marinades a fuller flavor. Besides, what I haven’t finished in a sitting wouldn’t provide enough wine to satisfy my red wine vinegar needs.
Secondly, chances are my undrunk wine probably contains some traces of sulfites, even if it’s been opened for a length of time. Sulfites are the bane of the successful transition of red wine to red wine vinegar and most of the wine I buy in the local store does contains sulfites. It’s difficult to find wine without them and they’re fine for drinking (I know some people have trouble with sulfites, but fortunately I don’t). There are ways to minimize the sulfite levels that keep the wine fresh in the bottle, but I don’t want to take any chances. When I’m making DIY red wine vinegar, I only use wines that have no sulfites.
Using a sulfite‑free red like Mother’s Choice puts you one step ahead because you’re starting with clean, ready‑to‑ferment wine that wants to become something even more flavorful. Just like oxymels, vinegar‑making is part kitchen craft, part tiny science experiment, and part “grandmother tradition” that is making a comeback.
Why Red Wine Vinegar Deserves a Permanent Spot in Your Kitchen
Red wine vinegar is one of the most widely used vinegars in Mediterranean and European‑style cooking, right up there with apple cider, white wine, and distilled white vinegar. Cooks love it because it retains the flavors from the wine it came from with fruity notes and rounded, robust essences without sour traces.
In everyday recipes, red wine vinegar:
- Wakes up rich foods like steak, mushrooms, and cheese with bright acidity
- Brings a subtle ruby hue to dressings and sauces instead of leaving them pale
- Adds complexity that most store‑brand “pink” red wine vinegars just don’t deliver
When you make your own from a blend like Mother’s Choice, Frey Organic Red, or Pacific Redwood Organic Red Wine, you’re essentially crafting a custom vinegar that reflects that wine’s personality—and you can keep that batch going for months by feeding it more wine over time.
7 Simple Steps to DIY Red Wine Vinegar
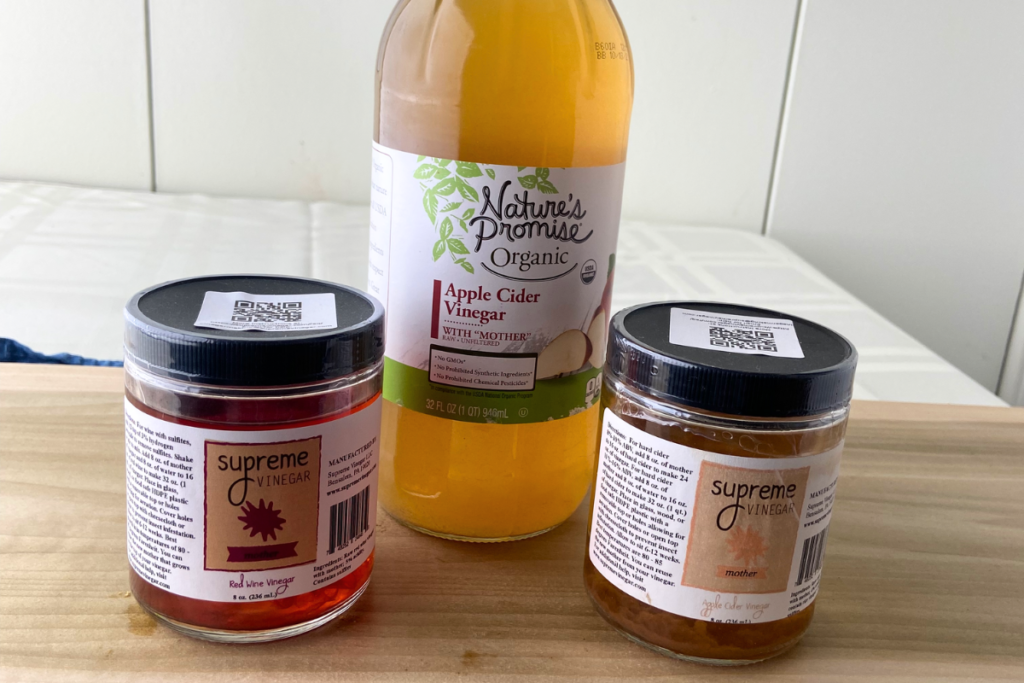
Vinegar starts with alcohol, oxygen, and a living starter called “mother of vinegar”—a cellulose‑rich biofilm of acetic acid bacteria that quietly converts alcohol into acetic acid. Using sulfite‑free wine simplifies things, because sulfites (often added to wine as a preservative) can slow or inhibit those helpful bacteria.
- Choose your vessel
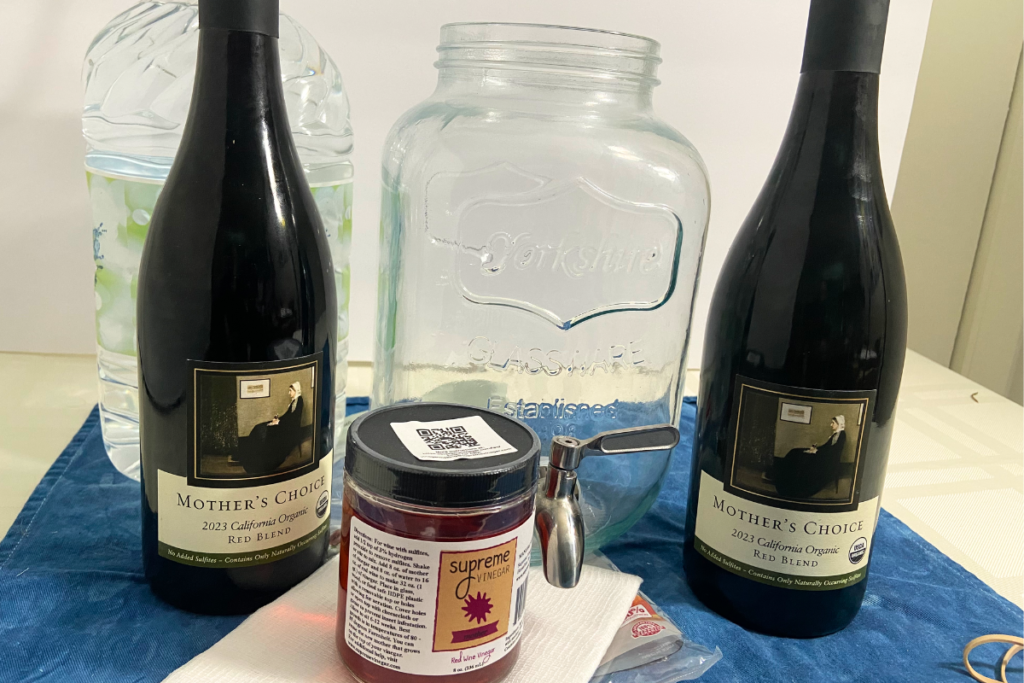
Use a wide‑mouth glass or ceramic jar—no metal—and wash it thoroughly. The wide surface area gives the bacteria access to oxygen. I like to purchase a beverage container that has a spout to make it easier to maintain a “forever” red wine vinegar supply. Thoroughly sanitize your container and any items that may come in contact with your mixture. - Mix wine and water
Pour in your sulfite-free red wine blend and dilute it with spring or mineral water. Avoid using chlorinated water because chlorine in tap water kills or inhibits the acetic acid bacteria (AAB) that make up your mother and that do the fermentation work. A simple ratio is about 2 parts wine to 1 part water, so the alcohol level stays under roughly 10%, which helps vinegar bacteria thrive. - Add the “mother”
To inoculate the batch, add either a piece of mother of vinegar (a gelatinous disc), or a generous splash (about 20–25% of the total volume) of raw, unpasteurized vinegar labeled “with the mother.” I prefer to purchase a jarred mother from a company like Supreme Vinegar to give me more control over the amount I add to my vinegar batch. - Let it breathe (but not too much)
Cover the jar with a piece of cheesecloth or a clean coffee filter and secure it with a rubber band. This keeps dust and fruit flies out while letting oxygen in. I usually do a double fold of a cheesecloth strip and haven’t had any problems with flies. - Ferment in a cozy corner
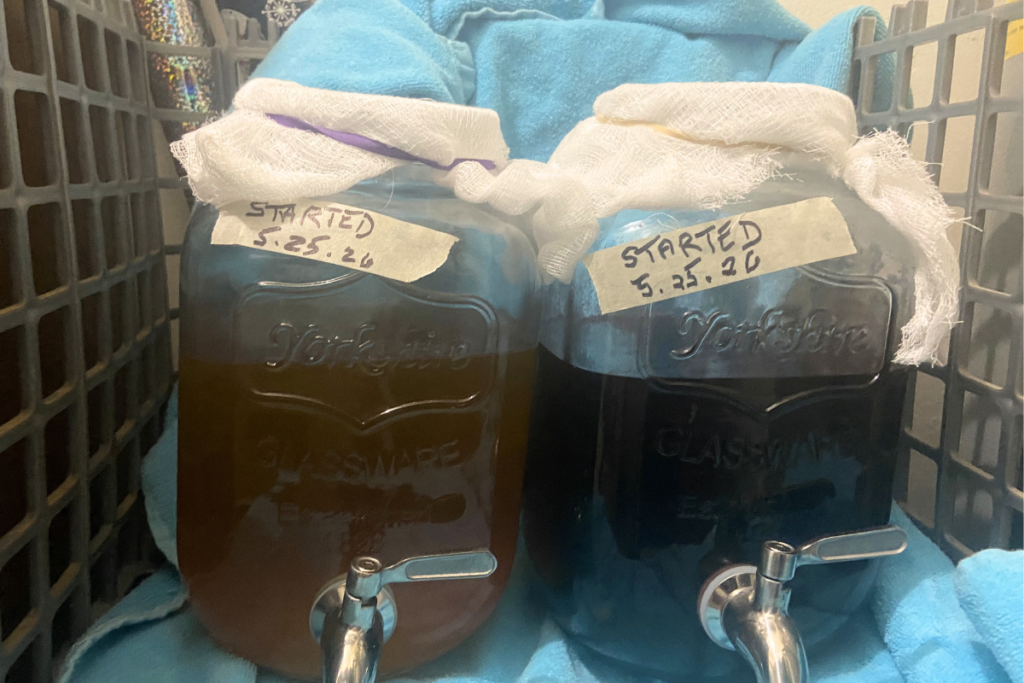
Place the jar in a warm, dark spot—room temperature to slightly warmer is perfect—and leave it alone for a few weeks. Over time you’ll notice a cloudy layer forming on top: that’s your mother of vinegar getting to work. You should also begin to notice the aroma of vinegar beginning to emerge from your beverage dispenser. - Taste for readiness
Start tasting after about 3–4 weeks. When the liquid is pleasantly tangy, with no alcoholic burn and a clean, wine‑like depth underneath, it’s ready. Having the spigot makes this super easy without disturbing the mother. If it still tastes like wine, give it more time. First couple of times around making vinegar at home, I taste tested my DIY against store-bought red wine vinegar to help determine my vinegar’s readiness. The cool things was when it tasted better. - Strain, bottle, and (optionally) stabilize
Gently remove or reserve the mother, strain the vinegar if you like it clear, and pour into clean glass bottles. Some makers heat the final vinegar briefly to halt further activity, but if you enjoy a living product and don’t mind the possibility of a new mother forming, you can skip that. I like to leave a portion in the original jar, feed it with more sulfite-free blend plus water, and keep the vinegar flowing as I use up my batch for marinades., sauces, and vinegar drinks.
Health Notes: Gentle Support, Not a Miracle Cure
Vinegar has always lived in that space between food and folk remedy. Modern research focuses mostly on acetic acid, the main acid in all vinegars, not just red wine varieties. While red wine vinegar shouldn’t be treated as medicine, there are a few points worth mentioning in terms of health benefits to be derived from red wine vinegar:
- Blood sugar: Acetic acid may modestly improve post‑meal blood sugar in some people when consumed with high‑carbohydrate meals.
- Digestion and satiety: Acidity can stimulate digestive juices and make meals feel more satisfying, which may help with portion control for some.
- Fermentation interest: Homemade vinegar is a live, fermented food, which appeals to readers who care about microbiome‑friendly, traditionally prepared ingredients.
Please remember this friendly disclaimer: Vinegar is not a substitute for medical care and people with reflux, ulcers, or enamel concerns should be cautious when consuming vinegar or recipes containing vinegar. Also remember that vinegar it should always be diluted in food or drinks rather than taken in large, straight shots which can damage tooth enamel and throat and stomach linings.
Storing Your Red Wine Vinegar Safely
Red wine vinegar is relatively easy to store, but a few habits protect both flavor and safety:
- Choose glass bottles with tight caps to prevent off‑odors and preserve aroma. Be sure to sanitize before use.
- Keep bottles in a cool, dark place. There’s no need to refrigerate homemade vinegar but storing in a pantry or cupboard will help maintain color and flavor over time.
- Expect new mothers to appear in partially used bottles; these are harmless and can be strained off or used as starter for a new batch. I just give the bottle a shake to dilute the mother before using if a mother appears in my vinegar.
- Label and date each bottle so you can track how flavor develops and when you made it.
One important caution: homemade vinegar shouldn’t be used as the acidic base in canning recipes unless you have had its acidity professionally tested. Safe pickling vinegar must meet specific acidity levels that DIY vinegars may not reliably reach. It’s not really a problem or too expensive to buy a gallon jug of distilled white vinegar to use in pickling (and cleaning) at my local store.
Troubleshooting Homemade Red Wine Vinegar: Simple Fixes for Common Problems
You can do everything right and then somewhere along the process you notice that your homemade red wine vinegar taking forever to turn, it’s smelling a bit “off,” or it’s growing a mother that looks stranger than you expected? That’s normal territory for home vinegar makers. Red wine vinegar lives in that funny overlap between kitchen craft and small science experiment, and sometimes the bacteria, wine, and environment need a little nudge to behave.
Let’s take a look at the most common issues—slow vinegar, odd smells, and confusing mothers—and offers simple, practical fixes so you know what’s normal, what’s not, and how to steer your batch back on track.
Problem 1: “My vinegar is slow to turn and still tastes like wine.”
- Alcohol level is too high. Very strong wine (or no dilution) can make it harder for acetic acid bacteria to thrive.
- Not enough starter (mother). A tiny splash of starter vinegar or a very small piece of mother may mean too few bacteria to convert the batch efficiently.
- The environment is cool or low‑oxygen. Vinegar bacteria like room‑temperature warmth and access to air near the surface. A cold corner or tightly sealed lid slows everything down.
Simple fixes:
- Check dilution. If you used straight wine, consider gently stirring in a bit of water to bring the alcohol level down (roughly in a 2 parts wine : 1 part water range). You don’t need precision chemistry—just don’t leave it very strong.
- Add more starter. Pour in a generous splash of raw vinegar that contains mother or add a larger piece of mother from an active batch. More starter = more workers on the job.
- Move the jar. Shift your vinegar to a slightly warmer, dark spot at typical room temperature and make sure you’re using breathable covers like cheesecloth or a coffee filter instead of an airtight lid.
Then keep tasting every week or so. Most batches that were “slow” will eventually catch up once they have the right conditions and enough bacteria.
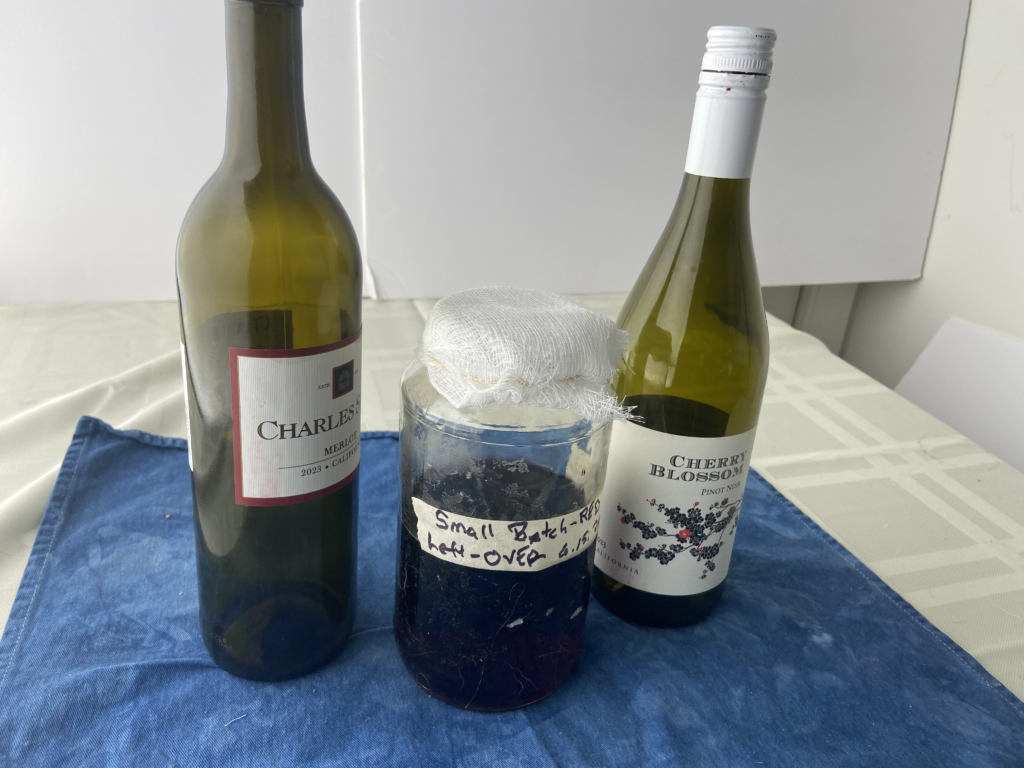
Problem 2: “It smells weird—how do I know if it’s gone bad?”
Problem 2: “It smells weird—how do I know if it’s gone bad?”
Normal smells:
- Wine plus a gentle vinegar tang.
- Slight yeasty or fermenty notes early on.
Warning signs:
- Strong rotten, moldy, or “swampy” odor.
- Heavy nail‑polish remover/solvent smell that doesn’t fade.
- Any scent that makes you instinctively recoil.
Simple checks and fixes:
- Look at the surface. A healthy mother is a jelly‑like, often beige or off‑white disc or cloud. Patchy, fuzzy mold in odd colors (green, black, bright white fuzz) is a sign to discard the batch.
- Trust your nose. If the smell genuinely seems rancid or moldy rather than vinegary, it’s safest to throw it out, clean your vessel thoroughly, and start fresh with new wine and a clean starter.
- Avoid “rescuing” heavily contaminated batches. Once mold or spoilage takes hold, especially in home conditions, the safest option is to let that batch go rather than trying to skim and salvage.
Most slightly strange smells early on will resolve as the wine fully converts and the vinegar “settles.” It’s the truly unpleasant, rotten odors plus visible fuzz that should send you back to square one. I like to compare my fermenting vinegar to existing batches that I know are good.
Problem 3: “The mother looks odd. Is that normal?”
Mother of vinegar is rarely pretty. It can look like a jelly sheet, a cloudy raft, stringy strands, or a blob. Appearance alone doesn’t usually tell you whether things are good or bad; it’s about texture, color, and whether there’s fuzz.
What’s normal:
- Jelly‑like discs or skins on the surface.
- Cloudy or stringy strands suspended in the liquid.
- Layers of mother forming over time as you feed and re‑use a batch.
What’s not:
- Fuzzy, hairy patches.
- Bright green, blue, or black spots.
- Dry, crusty growth clinging above the liquid line.
Simple approach:
- If the mother is jelly‑like and reasonably uniform, it’s probably fine—even if it looks a little alien.
- If you see fuzz or suspicious colors, discard the batch and mother together, scrub and sanitize the container, and begin again. Inspect the container for small, thin cracks that may let air and bacteria into the vinergar.
You can also gently remove an overly thick mother layer if it seems to be blocking oxygen from reaching the liquid, leaving a smaller piece or fresh starter to keep working.
Problem 4: “It turned, but the flavor is harsh or flat.”
Sometimes the vinegar “works,” but the taste isn’t what you hoped—too sharp, too thin, or oddly dull.
Possible reasons:
- Wine choice.
- Very cheap or heavily manipulated wines can lead to uninteresting vinegar.
- Over‑aggressive dilution.
- Too much water can make the vinegar feel weak or watery, even after full conversion.
- Insufficient aging.
- Fresh vinegar can be more one‑note; a little time often rounds it out.
Simple fixes:
- Blend with a better batch. Mix a small amount of flat vinegar into a richer, well‑developed batch to improve depth.
- Use it in cooking first. Harsh or thin vinegar can still work beautifully in pan sauces, braises, and deglazing, where butter, stock, and aromatics smooth it out.
- Give it time. Bottled vinegar often improves over weeks or months in a cool, dark pantry. Label and date your bottles so you can taste how flavor evolves.
If you consistently get flat results, try upgrading the wine you start with and adjusting dilution slightly.
Problem 5: “Nothing is happening at all.”
If weeks go by with no mother, no tang, and no change, something is blocking the process.
Likely culprits:
- Heavy sulfites in the wine. Strong preservatives can suppress vinegar bacteria.
- Chlorinated water. Chlorine can inhibit or kill the microbes you’re relying on.
- No real starter. Pasteurized vinegar without “mother,” or a starter that wasn’t active, won’t kick off the process.
Simple fixes:
- Switch wines. Try a wine with lower sulfites or one specifically labeled sulfite‑free when possible.
- Use filtered or non‑chlorinated water. Even a simple filter jug or bottled spring water can help.
- Add a live starter. Use raw vinegar that clearly contains mother or a purchased mother of vinegar rather than plain, heat‑treated options.
With those changes, most “stuck” batches either begin to respond or you get a much more reliable outcome with the next attempt.
When to Start Over (And Why That’s Okay)
Part of home vinegar making is accepting that not every jar will become the perfect, ruby‑red bottle you imagined. If you run into:
- Persistent bad smells,
- Visible mold or fuzz,
- Multiple weeks with zero progress even after adjusting dilution and starter,
starting over is not a failure—it’s how you protect yourself and your kitchen while learning what your particular setup likes best.
Fresh wine, a clean jar, a healthy starter, and a slightly warmer corner often turn “I couldn’t get this to work” into “oh, now it’s easy.”
Three Recipes to Show Off Your Homemade Vinegar
Homemade red wine vinegar is a versatile tool to have on hand and there are countless ways to use your ready batch of vinegar. Here are versatile recipes that bring out the best in red wine vinegar in a pan sauce, a shrub, and a fresh Mediterranean relish.
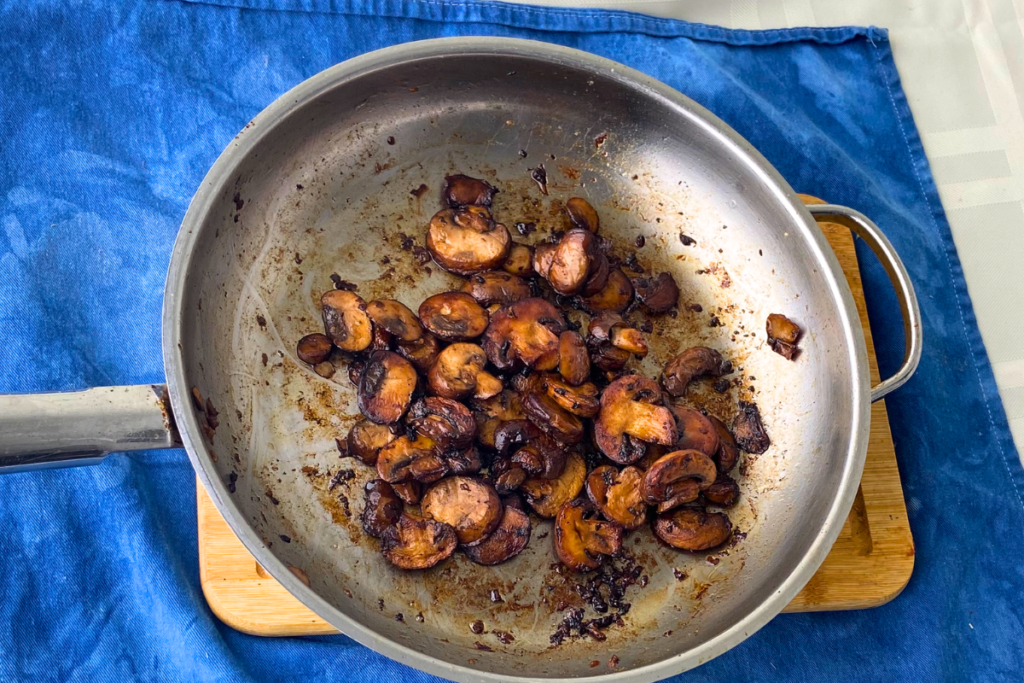
Pan-seared Mushrooms with Red Wine Vinegar Pan Sauce
Equipment
- Saute Pan
Ingredients
- 1 lb Cremini mushrooms
- 2 tbsp Butter
- 2 tbsp Fresh, chopped assortment of herbs
- 1 tbsp Olive Oil
- 1 tbsp Home-made red wine vinegar
Instructions
- Sear sliced mushrooms in a hot pan with olive oil until they’redeeply browned.
- Add a knob of butter,garlic, and herbs, then splash in your red wine vinegar to deglaze, scraping upall the browned bits.
- Finish with a little stockif you like, reducing until glossy and spoonable.
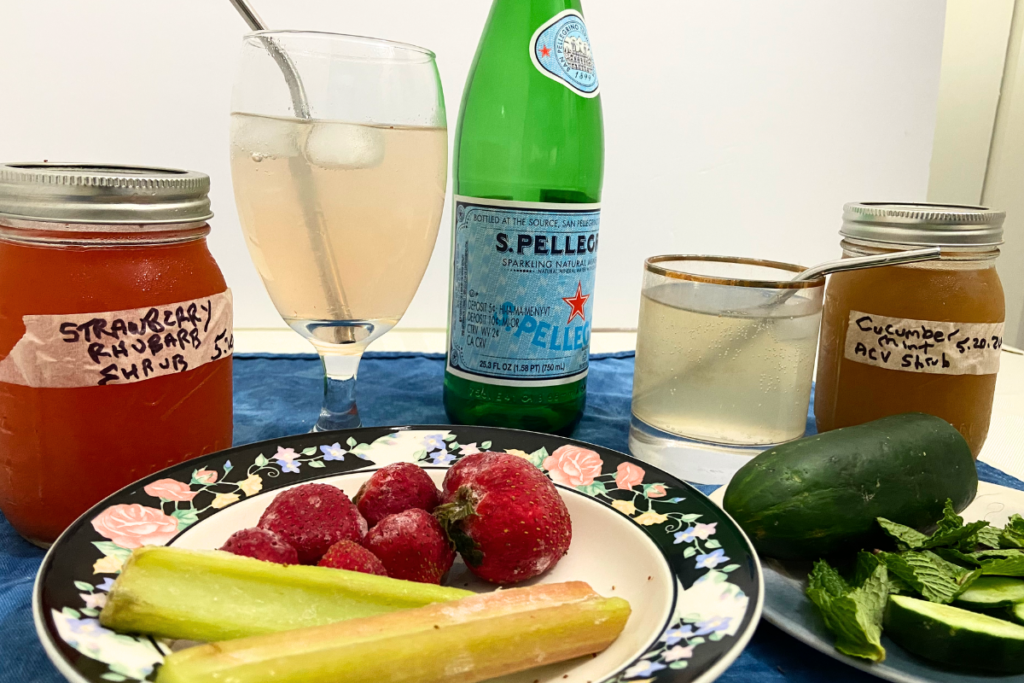
Red Wine Vinegar Strawberry and Rhubarb Shrub Mocktail
Equipment
- Saran wrap or bowl cover
Ingredients
- 3/4 cup Fresh strawberries
- 3/4 cup Chopped rhubarb
- 1/2 cup Brown sugar (or to taste)or honey to sweeten to taste
- 1 1/2 cups Homemade Red Wine Vinegar
- 8 oz Sparkling Water
Instructions
- Combine fruit (fresh or frozen) and sugar and let them macerate until the sugar dissolves and the fruit has shared its color and flavor. Stir a few times and let sit several hours or overnight in the fridge.
- Pour fruit/sugar syrup into a mason jar and add vinegar. Shake well. Let sit for several hours in the fridge.
- Strain shrub mixture with mesh strainer or cheese cloth.
- Store in fridge. For best flavor, let it sit for a few days before using.
- Mix 1 tbsp of shrub with 8 oz of sparkling water. Sip through a straw to protect tooth enamel.
Mediterranean Tomato and Olive Relish
Equipment
Ingredients
- 1/2 cup Chopped tomatoes
- 1/2 cup Mixed Olives, pitted
- 1 tbsp Capers (or to taste)
- 1 tbsp Olive Oil
- 1 tbsp Homemade Red Wine Vinegar
- Fresh, chopped assortment of herbs
Instructions
- Stir together chopped tomatoes, olives, capers, garlic, red wine vinegar, and good olive oil.
- Season with herbs (basil, oregano, or parsley all work) and a pinch of salt.
- Spoon over grilled fish,chicken, beans, or crusty bread.
My Homemade Red Wine Vinegar Toolkit
I seem to always be in one stage of creating my own vinegars and make sure I always have the following on hand before I start a new batch:
- Sulfite-Free Red Wine Blend – I know there are products on the market that you can purchase to remove sulfites and histamines from wine prefer to always start with a sulfite-free red to minimize the impediments to fermentation of the wine.
- ‘Mother’ of Vinegar – I prefer to buy a jarred red wine vinegar ‘mother’. However, it doesn’t matter what type of vinegar the mother comes from. The vinegar principally derives its flavors from the fruits and herbs so it’s okay to use an ACV, white wine vinegar, or red wine vinegar ‘mother’ to kick things off or even include a portion of ACV with ‘mother’.
- Glass Beverage Dispensers – I have several dispensers and prefer ones that have spouts. Being able to easily pour my finished vinegar out without disturbing the ‘mother’ lets me continue to add more wine and water and reuse the ‘mother’ over and over.
- Spring Water – Avoid using chlorinated water because it disrupts the fermentation chemistry. Chloramines that many municipal water systems now use are even worse.
- Cheese Cloth – Ideal for letting air in and keeping fruit flies and other insects out.
- Wine Wand Wine Filter – If you can’t find sulfite-free wine, another approach is to use a wine wand filter that removes histamines and sulfites.