
How to Make Small‑Batch Wine Vinegar from Leftover Wine
Turn end‑of‑bottle red, white, and rosé into small‑batch wine vinegar in jars, even in tiny kitchens, with tips on sulfites, starters, containers, flavor blends, and easy everyday uses.
This post contains affiliate links to products and books I genuinely use and love. If you buy through my links, I may earn a small commission as an Amazon Associate or through my affiliation with other retailers from qualifying purchases that you make at no extra cost to you.
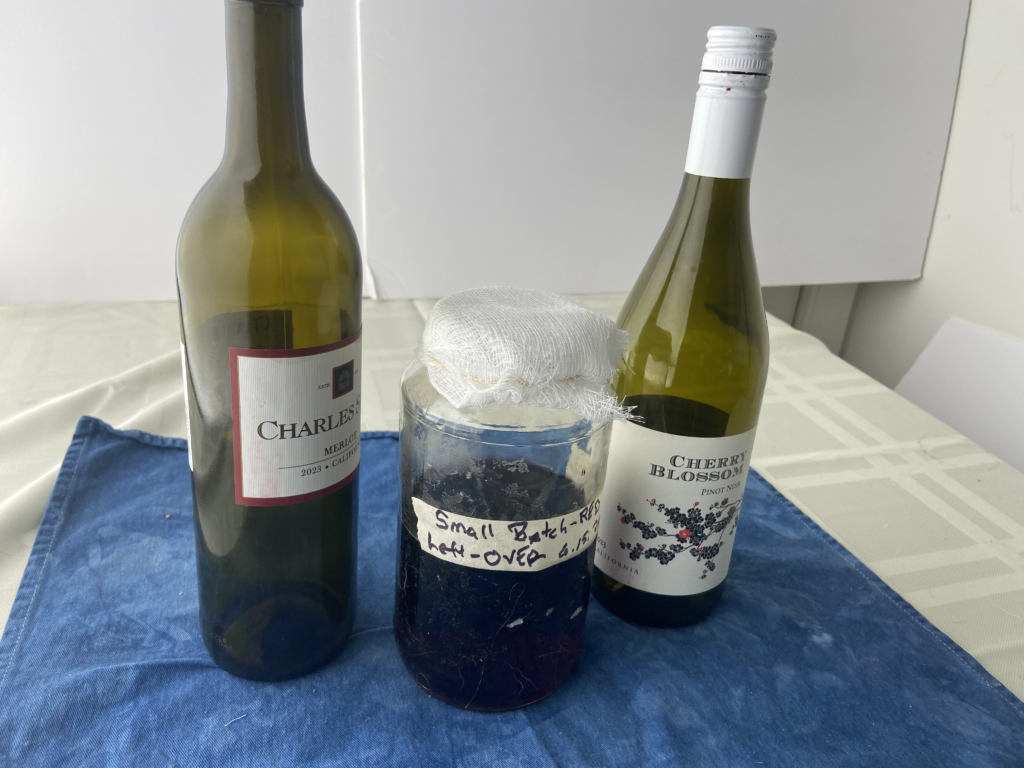
Instead of feeling guilty about wasting leftover wine or wishing you had room for a big counter‑top beverage dispenser with a spigot to make large batches of vinegar at home, here’s a great idea. You can turn those end‑of‑bottle wines into custom vinegars in jars that tuck easily into a cupboard shelf.
In this post, we’ll walk through what “small batch” actually looks like, how to work with sulfited wines, ways to blend different leftovers into something tasty, and how to store your finished vinegar so it’s ready for dressings, sauces, and pan deglazing whenever you need it.
What Counts as a Small‑Batch Wine Vinegar?
Most traditional vinegar setups assume you’re starting with at least a few liters of liquid and using a wide crock or beverage dispenser with a spigot. That’s wonderful if you have space and a steady supply of wine, but it’s not necessary. Space limitations shouldn’t prevent you from enjoying the satisfaction of making wine vinegar at home.
For small‑batch vinegar, think in terms of:
- 1 to 4 cups (240–960 ml) total wine per batch
- Jars in the pint to quart size range (about 500–1000 ml)
- Slight dilution with water to keep alcohol under roughly 10 percent, giving your vinegar bacteria a happier environment
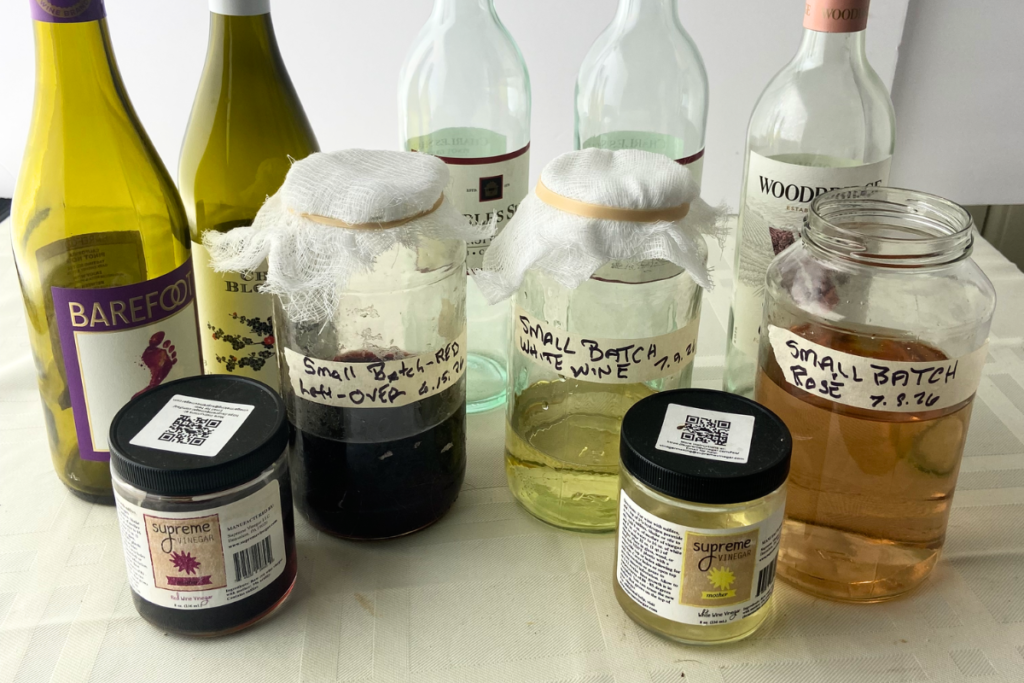
Making small batch wine vinegar at home is a terrific way to experiment with flavors and create unique blends. You can have one jar going with a blend of red wines, another with white, and maybe a third with rosé, all taking up less space than an average cereal box.
A Quick Word on Sulfites in Leftover Wine Vinegar
When I’m making large batches of wine vinegar, I always start with sulfite‑free wines because sulfites can slow or inhibit the acetic acid bacteria that build the mother and do the actual vinegar work. It usually involves a special trip to a wine store because most wines sold today contain sulfites.
As a result, most of the wines that I enjoy with meals contain sulfites, so I expect my small batch wine collections to require an extra step or two in order to become vinegar. You can’t truly “get rid of” sulfites easily at home, but you can help minimize their impact:
- Give the wine air:
Pour leftover wine into a clean jar or bowl and let it sit uncovered for a day or so. Oxygen and time help some free sulfites dissipate. - Use commercially available products to eliminate sulfites:
Use wine wand sulfite purifiers or wine purifier filters to remove both sulfites and histamines. - Avoid heavily sulfited wines if possible:
If you’re buying wine with vinegar in mind, reach for bottles labelled low‑sulfite or sulfite‑free when you can. - Use a strong starter:
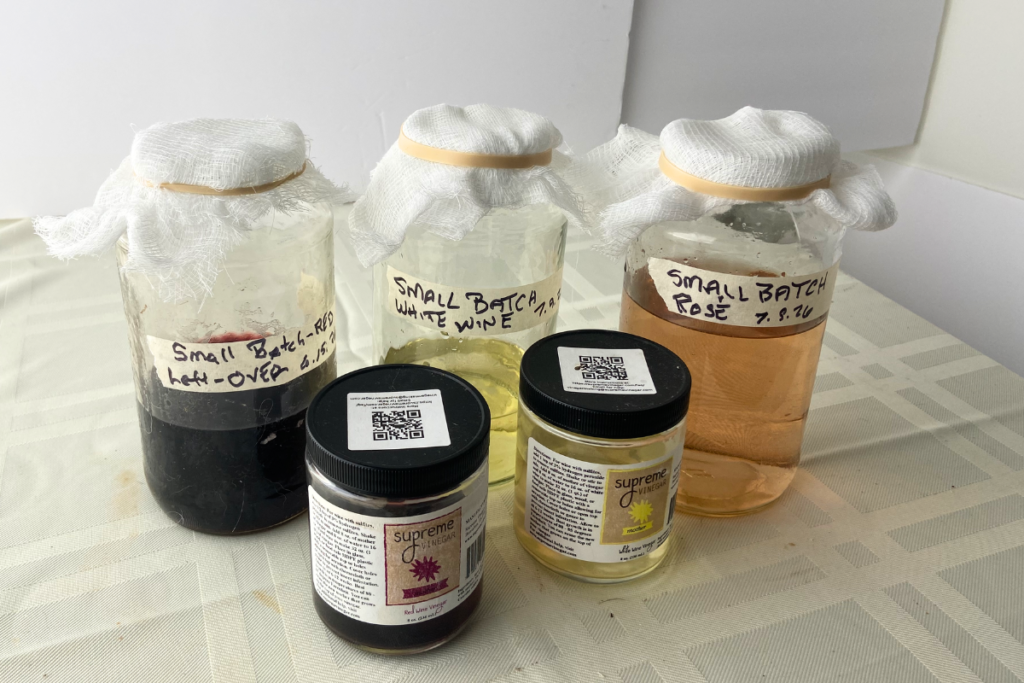
Add a generous splash (20–25% of the total volume) of raw vinegar with the mother or a piece of mother of vinegar to inoculate the batch so helpful microbes outcompete anything else. I like to use a packaged vinegar ‘mother’ that matches the type of wine I’m using.
Think of it as stacking the deck rather than performing a chemical exorcism. You’re making conditions friendlier for the vinegar culture so it can do its job despite the preservative.
Best Containers for Small‑Batch Wine Vinegar
You don’t need a 1-gallon beverage dispensers to make small batches. Glass jars and food‑safe containers work beautifully, and you don’t need a lot of cheesecloth to let the process happen.
Good options include:
- Wide‑mouth glass jars (pint or quart size) for red, white, or blended batches.
- Small glass beverage dispensers if you like the idea of a “forever” vinegar jar with a spigot on a tiny scale
- Vinegar dispenser bottles for storage once the vinegar is finished. Important details:
- Avoid metal containers or lids that can corrode. Use plastic‑lined caps, swing‑top bottles, or corks for storage. You can also use parchment paper to protect metal lids from corroding when sealing the bottles.
- Use cheesecloth or a coffee filter with a rubber band over the fermentation jar so oxygen can get in while fruit flies stay out.
- Wash everything thoroughly. I strongly suggest sanitizing jars and utensils with a product like Star San rather than boiling water, especially for dispensers that could crack with heat. (Speaking from experience here, unfortunately)
Basic Method: How to Make Small‑Batch Wine Vinegar at Home
Here’s a straightforward approach you can adapt to whatever leftover wine you have.
Step 1: Collect and combine leftover wine
Pour leftover wine into a wide‑mouth jar. Red wines can go together; white wines can go together; rosés can have their own jar. If you’re blending different reds, aim for combinations that make sense on the table. For example, I mix medium‑bodied reds like Merlot, Grenache, or Pinot Noir in one jar while in a separate jar I have my bigger, more tannic wines like Cabernet Sauvignon or Syrah. You don’t have to be precise, but thinking in “families” helps flavor. I’m not quite as picky about my white wines or rosés.
Step 2. Let the wine breathe
Leave the jar uncovered for 12–24 hours to let carbonation (if any) and some free sulfites dissipate. This is especially useful if your leftovers came from wines that felt a bit sharp or preservative‑heavy. I cover the opening with a bit of cheesecloth or coffee filer held with a rubber band to keep insects out.
Step 3. Dilute slightly, if needed
Acetic acid bacteria thrive best when the starting alcohol is under roughly 10 percent. Many table wines are around 12–14 percent alcohol, so a simple dilution helps:
- Mix about 2 parts wine to 1 part spring water to lower the alcohol for most small batches. Chlorinated tap water may contain minerals, chlorine, fluoride, and other substances that could potentially interact with the acetic acid in vinegar or affect its properties and taste.
- For lower‑alcohol wines or if you prefer a stronger base, you can go lighter on the water—just keep alcohol under that comfortable threshold.
For a truly small batch, that might look like:
- 2 cups leftover wine
- 1 cup spring or filtered water
Step 4. Add the mother
To give the mixture a boost add:
- A piece of mother of vinegar, or
- A generous splash (about 20–25% of the total liquid volume) of raw, unpasteurized vinegar with the mother.
- A few tablespoons of a commercially jarred mother of vinegar.
You can use a mother from an existing red wine vinegar batch or a commercial starter, which I prefer. The mother doesn’t care about your flavor or color rules. She just wants alcohol and oxygen and the taste of the vinegar comes from the wine flavors, not that of the ‘mother’.
Step 5. Cover and let it breathe
Cover the jar with cheesecloth or a coffee filter secured with a rubber band. The goal is to admit oxygen but block dust and fruit flies. Place the jar in a warm, dark corner or back of a closet at room temperature or slightly warmer.
Step 6. Wait and taste
Now you step back and let science run its course. Over the next few weeks, you may see a cloudy layer or jelly‑like disc forming on top—that’s the ‘mother’, getting to work. Start tasting after about 3–4 weeks. When the liquid is pleasantly tangy, free of alcoholic burn, and tastes like a balanced vinegar rather than “wine plus sour,” it’s ready. If it still tastes mostly like wine, give it more time and taste again in a week. I taste-test with previous successful batches I have on hand and because you’re working with small jars, it’s easy to dip in a clean spoon and compare batches side‑by‑side.
Step 7. Strain, bottle, and label
I like to remove a good portion of the ‘mother’ from the jar and store separately. I use it for subsequent batches or give it to friends who want to make their own vinegar at home. I also allow some of it to accompany my vinegar into the new jar to get a little extra benefit from the healthy bacteria and enzymes that promote gut health and digestion.
Label with:
- Type of wine(s) blended (e.g., “Cab/Merlot blend vinegar,” “mixed white leftovers”)
- Month and year finished
Store with all your other vinegars and oils. There’s no need to refrigerate and pantry storage keeps color and flavor stable over time.
Blending Different Leftover Wines into Custom Vinegars
The fun of small‑batch vinegar is that you can treat your jars like tiny blending labs and if you find a blend that works well you can make a bigger batch down the road.
Some simple pairing ideas:
- Soft, fruity red blend:
Leftover Pinot Noir, Grenache, Zinfandel, or lighter Merlot makes a gentle, versatile vinegar for salads and pan sauces. - Bold, structured red blend:
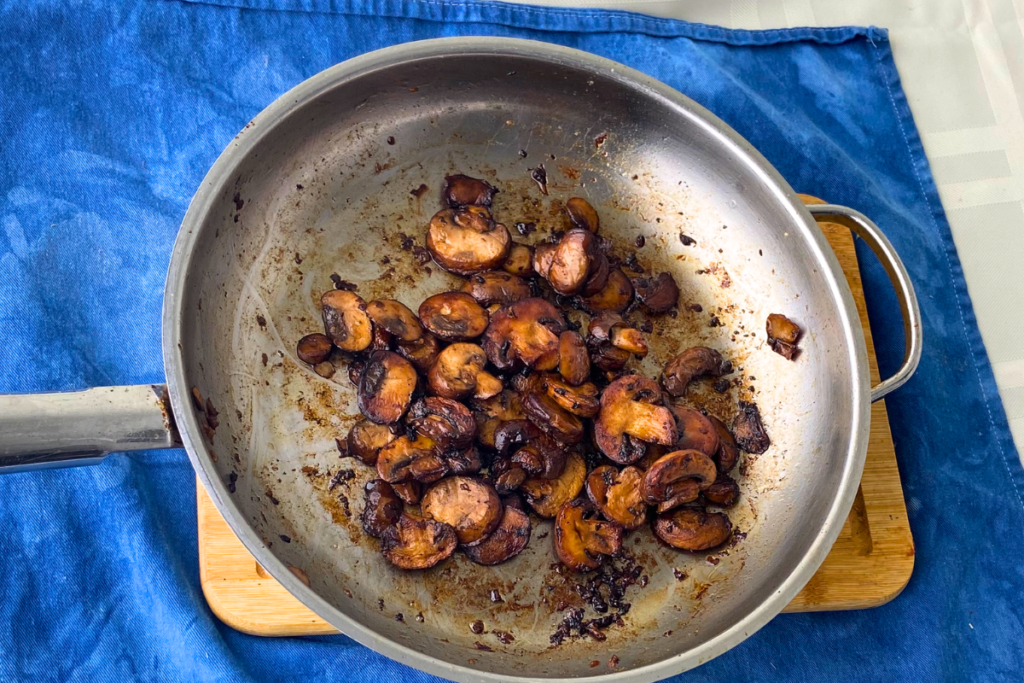
Cabernet Sauvignon, Syrah, and other fuller‑bodied reds create a deeper vinegar that stands up to mushrooms, steak, and richer dishes. - Bright white blend:
Leftover Sauvignon Blanc, Pinot Grigio, or dry Riesling can become a white wine vinegar that’s lovely in vinaigrettes and seafood dressings. - Rosé experiments:
Mixed dry rosés often make delicate, slightly fruity vinegars that are perfect for summer dressings and light pickles.
How Much Space Do You Actually Need for Small‑Batch Vinegar?
This is one of the best parts of small‑batch setups: you can make impressive vinegars in very little space.
A few realistic layouts:
- One quart jar of red on a pantry shelf for blended leftovers
- One pint jar of white for lighter wines
- One pint or half‑pint jar of rosé for seasonal experiments
As long as the jars sit undisturbed throughout the vinegar-making process in a warm, dark spot with their cloth covers intact, they don’t ask much of you.
Storing and Using Homemade Small‑Batch Wine Vinegar
Once bottled, the fun starts and small batches behave like any other homemade vinegar:
- Keep them in sanitized glass bottles with tight caps.
- Expect new mothers to appear in partially used bottles—shake or strain as desired, or use those mothers to start new jars.
- Use your small batches for dressings, quick pan sauces, bright deglazes, shrubs, and drizzles over grilled vegetables.
One important safety reminder still applies: unless you’ve had your homemade vinegar’s acidity professionally tested, do not rely on it as the acid source in canning recipes that require a specific pH for shelf stability. For pickles headed to the pantry instead of the fridge, commercial vinegar with known strength is the safer choice.
Making Vinegar When You Don’t Have Much Wine Left Over
You do not need a lot of leftover wine to make this project worthwhile. A few practical habits help:
- Designate a vinegar jar:
Keep a single jar on the counter and pour small wine leftovers into it throughout the week before moving it to its fermentation spot. - Blend without overthinking:
Don’t worry about matching regions or vintages. If you liked the wines enough to drink them, chances are you’ll like them as a vinegar blend. - Taste as you go:
Small batches give you freedom to taste often. If a jar isn’t thrilling you, use that vinegar for cooking instead of salads and adjust your blends next time.
In the end, small‑batch vinegar is about turning “I hate wasting wine” into “I always have something interesting to cook with,” even in a tiny kitchen. A jar or two, a mother, a bit of patience, and the leftovers you already have can quietly become one of your favorite pantry staples.
Homemade Small‑Batch Wine Vinegar FAQs
How much leftover wine do I actually need to make vinegar?
Not much. A true small batch can start with just 1 to 4 cups of leftover wine per jar, diluted slightly with spring or filtered water if the alcohol is on the higher side. Pint‑ and quart‑size wide‑mouth jars are perfect for these amounts, and you can dedicate one to red wines, one to whites, and one to rosé so even modest leftovers feel like a worthwhile project.
Can I use sulfited wines to make small‑batch vinegar, or do they have to be sulfite‑free?
You can absolutely work with everyday sulfited wines. In fact, it’s can be a challenge to find wines without sulfites. Letting the wine breathe for 12–24 hours, using wine sulfite purifiers or filters, choosing lower‑sulfite bottles when you can, and adding a strong starter (a piece of mother or a generous splash of raw vinegar with the mother—around 20–25% of the liquid) all make it easier for acetic acid bacteria to thrive despite the preservatives.
How do I know when my small‑batch wine vinegar is ready to use?
Start tasting after about 3–4 weeks and keep going at weekly intervals. It’s ready when the liquid smells pleasantly vinegary, has lost its alcoholic burn, and tastes like a balanced vinegar instead of “wine plus sour.” Cloudiness and a jelly‑like mother on top are good signs. If it still tastes mostly like wine, give it more time. Once it’s ready, strain, bottle, and label it, and remember that homemade vinegar is best kept to dressings, pan sauces, shrubs, and other everyday uses rather than shelf‑stable canning recipes that require standardized acidity.