
4 Fall Fruit Vinegar Recipes to Make Besides Apple Cider Vinegar
Make pear and grape vinegar from juice and try cranberry-orange and pomegranate infused vinegars for holiday cooking, gifts, salads, and shrubs.
This post contains affiliate links to products and books I genuinely use and love. If you buy through my links, I may earn a small commission as an Amazon Associate or through my affiliation with other retailers from qualifying purchases that you make at no extra cost to you.
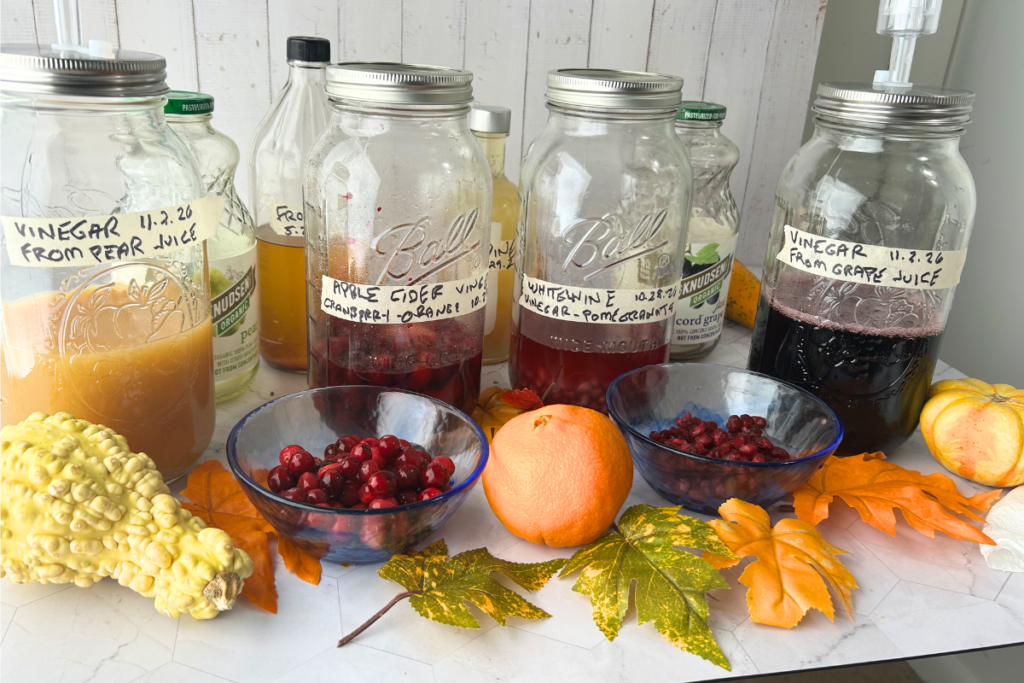
Apple cider vinegar gets most of the fall fruit vinegar recipe attention, and honestly, I understand why. Apples are everywhere this time of year. There are cider donuts, cider cocktails, apple pies, apple butter, and more jars of apple cider vinegar than any one pantry probably needs.
But once I start looking around my kitchen in November, I realize apples were taking up a little too much of the spotlight.
After all, there are a host of fall fruits that can be used in fall fruit recipes. It’s the time of year when bags of cranberries are waiting for their one annual moment in the holiday spotlight, and pomegranates are waiting for their moment to shine.
That is a lot of vinegar potential.
So, if you are ready to go beyond apple cider vinegar this fall, I have four ideas for you:
- Pear Vinegar (jump to recipe)
- Grape Vinegar (jump to recipe)
- Cranberry-Orange Infused Vinegar (jump to recipe)
- Pomegranate Infused Vinegar (jump to recipe)
Two are true fermented vinegars that take patience, a mother, and a little kitchen science. The other two are quicker fruit infusions that can be ready for holiday salads, mocktails, marinades, and homemade gifts in a jiffy.
Fall Fruit Vinegar Recipes vs. Fruit-Infused Vinegar Recipes: What’s the Difference?
Before we get into the fruit bowl, let’s clear up one important thing.
A true fruit vinegar is a two-step transformation. It begins with the transformation of fruit to alcohol, then alcohol to vinegar. The sugar from fruit ferments into alcohol and then acetic acid bacteria (the helpful vinegar-making bacteria often associated with a vinegar mother) converts that alcohol into acetic acid. That is the tangy vinegar part.
A fruit-infused vinegar starts with already-finished vinegar. You add fruit, citrus peel, herbs, or spices and let everything steep until the vinegar takes on new color and flavor. Oregon State Extension recommends using about 2 cups of fruit per pint of vinegar for fruit-infused vinegars
Both are worth making. They are simply different projects.
Think of pear and grape vinegar as your slow-cooking Sunday projects. Cranberry-orange and pomegranate vinegar are more like the holiday side dish that looks fancy but does not require you to panic in the kitchen.
Choose Your Starting Point: Juice or Infusion?
Start With Juice If You Want the Full Process Without the Fuss
For most people starting to experiment with fall fruit vinegar recipes, juice is the easy and sweet spot.
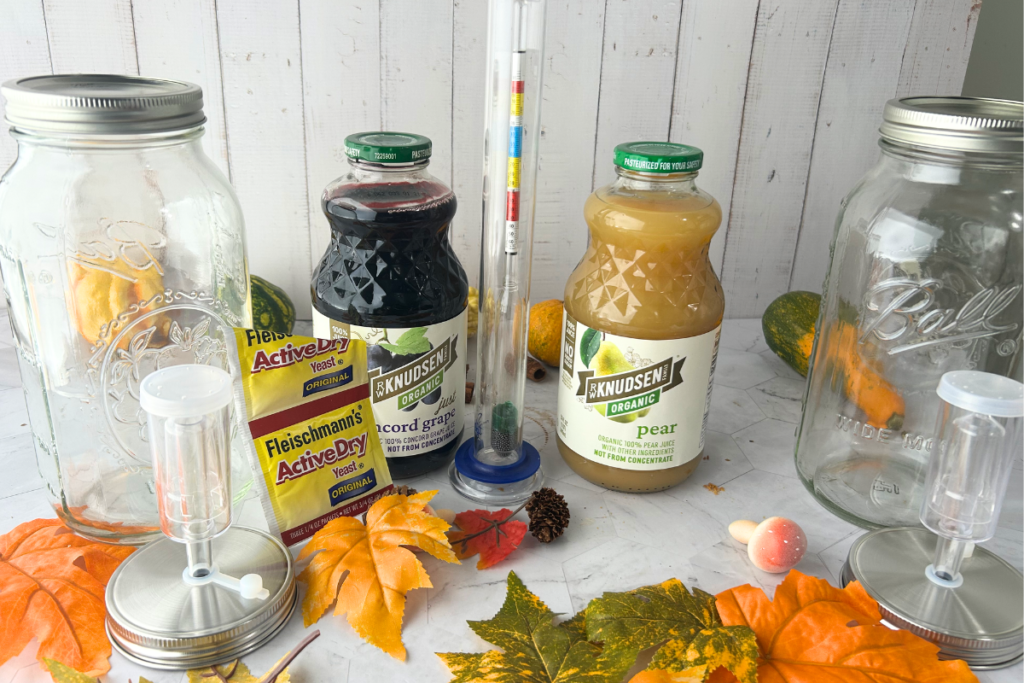
Starting with pear juice or grape juice still lets you make a true fruit vinegar from beginning to end: first the juice ferments into alcohol, then the alcohol ferments into vinegar. But you skip the messy part where you are crushing fruit, managing floating scraps, and wondering whether that brown pear bit is “rustic” or a problem.
Fresh-pressed juice, orchard juice, and store-bought juice can all work. If you buy juice, look for 100% juice without preservatives such as potassium sorbate or sodium benzoate, since preservatives can interfere with fermentation. Pasteurized juice is fine when you are adding your own wine yeast; in fact, using a chosen yeast gives you more control than hoping wild yeast handles the job beautifully. (extension.psu.edu)
Starting with pear juice or grape juice still lets you make a true fruit vinegar from beginning to end: first the juice ferments into alcohol, then the alcohol ferments into vinegar. But you skip the messy part where you are crushing fruit, managing floating scraps, and wondering whether that brown pear bit is “rustic” or a problem. Fresh-pressed juice, orchard juice, and store-bought juice can all work. If you buy juice, look for 100% juice without preservatives such as potassium sorbate or sodium benzoate, since preservatives can interfere with fermentation. Pasteurized juice is fine when you are adding your own wine yeast; in fact, using a chosen yeast gives you more control than hoping wild yeast handles the job beautifully.
Start With Finished Vinegar If You Want Big Flavor Without Fermentation
For those who want a seasonal vinegar without managing yeast, airlocks, hydrometer readings, or a vinegar mother, an infusion is the easy win.
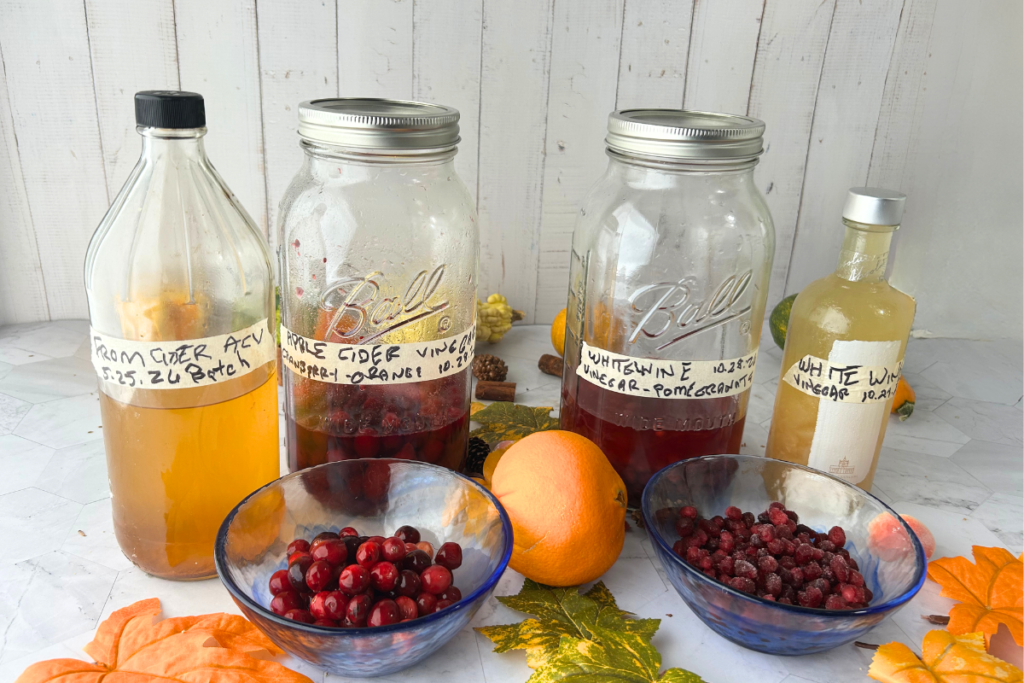
Cranberries, orange peel, and pomegranate arils bring bright color and fresh fall flavor to an already-made vinegar. You simply combine the fruit with a good commercial vinegar, let it steep, and strain it when the flavor is where you want it. No fruit wine stage. No wondering whether the airlock is bubbling enough. No tiny tart kitchen pet required.
Infused vinegars are especially nice when Thanksgiving or the holiday season is approaching. They are quick enough to use for salads, roasted vegetables, shrubs, mocktails, and homemade gifts—and they look beautiful on the counter while they steep.
For the most dependable result, start with a commercially made vinegar with a known acidity, such as white wine vinegar or apple cider vinegar.
Pear Juice and Pear Nectar are Not the Same Thing.
Pear nectar is thicker and usually contains finely sieved pear pulp, and it may also include water, sugar, acids, or stabilizers. It is lovely to drink, but plain pear juice is the easier and more dependable choice for a vinegar project.
Two Other Methods to Make Fruit Vinegar
Fast shortcut: Start with hard pear cider or wine and skip the alcohol-fermentation stage. You can learn more about this method here.
About scraps: You can make a scrap-based fruit vinegar, but it is more variable and more hands-on. It is best treated as an experienced-fermenter project rather than the main beginner recipe.
Can You Make Your Own Pear or Grape Juice at Home?
Absolutely—and that can be the best middle ground between scraps and store-bought juice.
For pears, use fully ripe fruit. Wash them, cut away damaged areas and stems and chop them up. Use a juicer, or if you don’t own one then crush or blend the fruit into a rough mash. Press or strain the mash through a jelly bag, nut-milk bag, several layers of cheesecloth, or a clean fine-mesh strainer. Your juice does not need to be perfectly clear; it just needs to be mostly free of heavy pulp before you move into the vinegar-making stage.
For grapes, especially frozen grapes, let them thaw first and then crush them well. Frozen grapes soften as they thaw, which makes them easy to break down. I would crush and press them rather than run them through a high-speed juicer, which can pulverize seeds and add bitterness. If you want a more wine-like grape vinegar, you can let the crushed grapes ferment briefly with their skins before straining. That is a little more hands-on, but it can give the finished vinegar more color and character.
For oranges, you can certainly make fresh orange juice—but I would not use it as the base for the true vinegar projects. Orange juice would be its own more specialized fruit-wine-to-vinegar experiment. For cranberry-orange infused vinegar, the easiest and most flavorful approach is still to use fresh cranberries, orange zest or thin strips of peel, and a finished commercial vinegar. That keeps the orange bright and fragrant without sending you down a separate orange-fermentation rabbit hole.
How to Make Pear Vinegar
Pears are one of those fruits that can go from perfectly firm to “why is this suddenly mashed potato texture?” in what feels like an afternoon. If you have a few very ripe pears on your counter, pear vinegar is a wonderful way to put them to work.
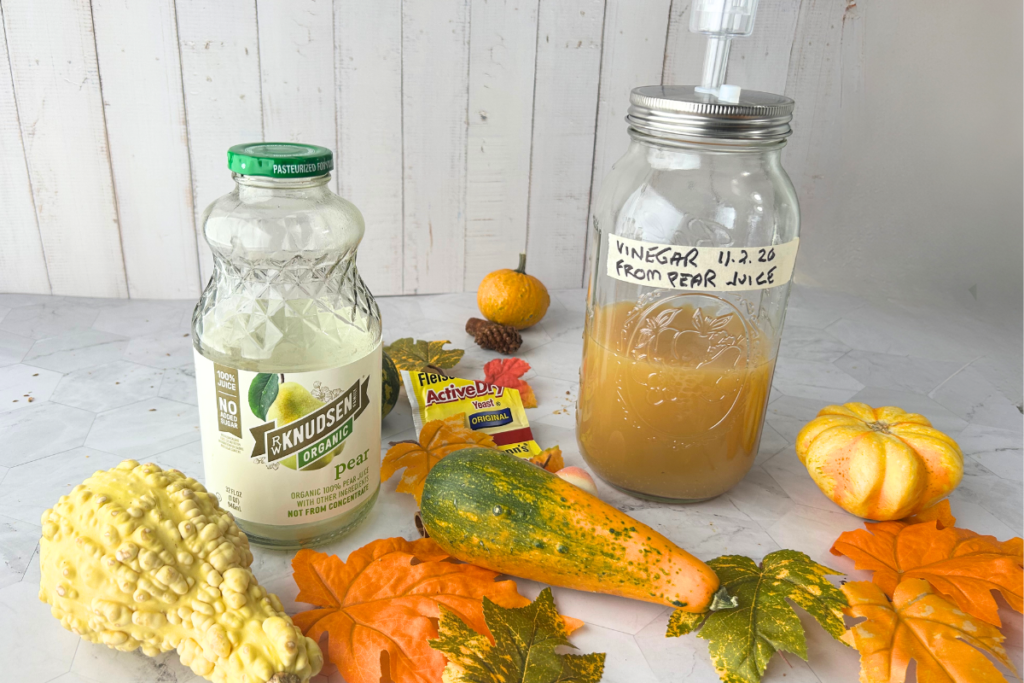
What Pear Vinegar Tastes Like and How to Use It
Pear vinegar is usually softer and more floral than apple cider vinegar. It has fruitiness, but not in a sticky-sweet way. It is more like the difference between a big apple orchard and a quiet pear tree at the edge of the yard—subtle, fragrant, and surprisingly elegant.
For a true pear vinegar, you can begin with pear scraps, fresh-pressed pear juice, store-bought 100% pear juice, or hard pear cider. Scraps make the most hands-on and least predictable batch; juice is the easier full-process route; and hard cider is the shortcut because the alcohol stage is already complete. You can use an active mother from another homemade vinegar batch or raw, unpasteurized vinegar with visible mother culture to get things moving.
I would use pear vinegar for:
- A vinaigrette with olive oil, Dijon mustard, honey, and black pepper
- Roasted delicata squash with walnuts and crumbled blue cheese
- A quick pan sauce for pork chops or chicken
- Pear-and-ginger shrubs with sparkling water
- A dressing for bitter greens, because bitter greens need a little help sometimes
Pear Vinegar: The Quietly Fancy Fall Vinegar
Pears are one of those fruits that can go from perfectly firm to “why is this suddenly mashed potato texture?” in what feels like an afternoon. If you have a few very ripe pears on your counter, pear vinegar is a wonderful way to put them to work.
Pear vinegar is usually softer and more floral than apple cider vinegar. It has fruitiness, but not in a sticky-sweet way. It is more like the difference between a big apple orchard and a quiet pear tree at the edge of the yard—subtle, fragrant, and surprisingly elegant.
For a true pear vinegar, you can begin with pear scraps, fresh-pressed pear juice, store-bought 100% pear juice, or hard pear cider. Scraps make the most hands-on and least predictable batch; juice is the easier full-process route; and hard cider is the shortcut because the alcohol stage is already complete. You can use an active mother from another homemade vinegar batch or raw, unpasteurized vinegar with visible mother culture to get things moving.
I use pear vinegar for:
- A vinaigrette with olive oil, Dijon mustard, honey, and black pepper
- Roasted delicata squash with walnuts and crumbled blue cheese
- A quick pan sauce for pork chops or chicken
- Pear-and-ginger shrubs with sparkling water
- A dressing for bitter greens, because bitter greens need a little help sometimes
Homemade Pear Vinegar From Pear Juice
Makes: about 4 to 4½ cups
Active time: about 20 minutes, plus occasional checking
Total time: about 4–8 weeks
Pear vinegar is mellow, lightly floral, and especially lovely in fall vinaigrettes, pan sauces, shrubs, and roasted-vegetable glazes.
This is the simplest true pear-vinegar method: first, pear juice ferments into pear cider; then the cider ferments into vinegar. It takes some patience, but the process is much more straightforward than starting with fruit scraps.
Ingredients
- 4 cups 100% pear juice, fresh-pressed or store-bought
- ¼ teaspoon wine yeast
- Yeast nutrient, optional; use the small-batch amount listed on the package
- ¾ cup raw, unpasteurized vinegar with an active mother
- Granulated sugar, only if needed after checking the juice with a hydrometer
Equipment
- 64-ounce wide-mouth glass jar or fermentation vessel
- Fermentation lid and airlock
- Hydrometer and test jar
- Coffee filter or clean tightly woven cloth
- Rubber band
- Fine strainer or coffee filter
- Clean glass bottle or jar with a nonreactive lid for storage
Before You Begin
Use 100% pear juice, not pear nectar. Check the ingredient list and avoid juice with potassium sorbate, sodium benzoate, sorbic acid, artificial sweeteners, or other preservatives that can interfere with fermentation.
Fresh-pressed, refrigerated juice is wonderful for this recipe, but pasteurized juice or juice from concentrate can also work as long as it is preservative-free.
Instructions
- Check the pear juice with a hydrometer.
Before adding yeast, test the juice’s specific gravity. Aim for a reading of about 1.045 to 1.055.
If it reads below 1.045, dissolve 1 tablespoon of sugar in about ¼ cup of pear juice, stir it back into the jar, and test again. Repeat gradually until the juice reaches the target range. You do not need to add water.
- Add the yeast.
Pour the pear juice into a clean 64-ounce fermentation jar. Add the wine yeast and optional yeast nutrient. Attach the fermentation lid and airlock. - Ferment the juice into pear cider.
Keep the jar in a dark place around 65°F to 75°F. Fermentation may begin within a day or two, although airlock bubbling is not the only sign that it is working.
After about 7 days, begin checking the specific gravity. The alcohol stage is finished when the reading stays stable for 2–3 days, the juice is no longer sweet, and the reading is near 1.000. This step usually takes 1–3 weeks.
Begin the Vinegar Stage.
Once the pear juice has fermented into pear cider, remove the airlock. If there is a heavy layer of sediment, strain the cider into a clean wide-mouth jar.
- Stir in the raw vinegar with active mother. Cover the jar with a coffee filter or clean cloth and secure it with a rubber band.
- Give the vinegar time and oxygen.
Keep the jar in a dark place around 65°F to 80°F. Do not seal it with a regular lid; the vinegar bacteria need oxygen to do their work. - Give the liquid a gentle stir with a clean nonmetal utensil every day or two during the first week. If a new vinegar mother forms on top, leave it alone rather than breaking it up.
- Taste after 3 weeks.
Begin tasting after about 3 weeks. Continue fermenting until the vinegar tastes pleasantly sharp and no longer has a noticeable alcohol flavor or smell. Depending on temperature and the activity of your mother, this can take 3–6 weeks. - Strain, bottle, and store.
When the vinegar is ready, strain out the mother and any sediment. Save the mother in a little finished vinegar for your next batch if you like.
Transfer the finished pear vinegar to a clean glass bottle or jar with a nonreactive lid. Label it with the date and store it in a cool, dark place or in the refrigerator.
Notes
- If your juice has a little natural sediment, that is fine. Strain only if there are large bits of pulp.
- A quiet airlock does not always mean fermentation has failed. The hydrometer is the best way to confirm whether the sugar is being converted into alcohol.
- If you see fuzzy mold, smell rot or decay, or notice slimy spoilage, discard the batch. A thin tan, beige, or jelly-like vinegar mother is normal.
- Homemade pear vinegar is wonderful for dressings, sauces, marinades, shrubs, and refrigerator pickles. Do not use it for shelf-stable canning or standard pickling recipes because its final acidity has not been tested or standardized.
Health Notes: Pears Are More Than Just Pretty
Fresh pears contain fiber and other nutrients, including vitamin C and potassium. Of course, a strained vinegar is not the same thing as eating a whole pear, and I would not present pear vinegar as a wellness cure in a pretty bottle. But using pear vinegar in salads, roasted vegetables, and lighter sauces is one more delicious way to build flavor around real food. (extension.oregonstate.edu)
Grape Vinegar: A Homemade Cousin of Wine Vinegar
Grape vinegar may sound fancy, but it is really a close cousin of wine vinegar. Red wine vinegar and white wine vinegar both begin with grapes, and homemade grape vinegar follows that same basic path: grape juice first becomes a young wine, then the wine becomes vinegar.
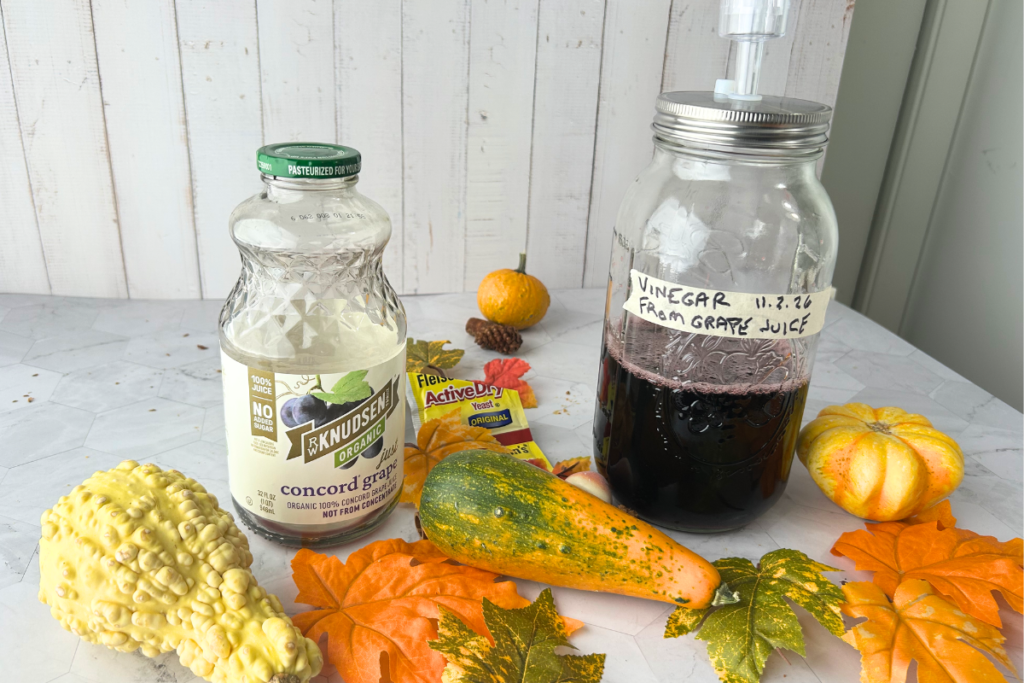
A dark grape juice will usually make a deeper-colored, fruitier vinegar, while white grape juice creates something lighter and brighter. Either one is wonderful in mushroom pan sauces, lentil salads, roasted Brussels sprouts, marinades, and a good shallot vinaigrette for a Thanksgiving salad.
For the most repeatable homemade batch, start with 100% grape juice. It gives you the full fruit-to-vinegar experience without the extra work of crushing grapes, managing fruit skins, or wondering what to do with leftover pomace.
Homemade Grape Vinegar From Grape Juice
Makes: about 4 to 4½ cups
Active time: about 20 minutes, plus occasional checking
Total time: about 4–8 weeks
Ingredients
- 4 cups 100% grape juice, fresh-pressed or store-bought
- ¼ teaspoon wine yeast
- Yeast nutrient, optional; use the small-batch amount listed on the package
- ¾ cup raw, unpasteurized vinegar with an active mother
- Granulated sugar, only if needed after checking the juice with a hydrometer
Equipment
- 64-ounce wide-mouth glass jar or fermentation vessel
- Fermentation lid and airlock
- Hydrometer and test jar
- Coffee filter or clean tightly woven cloth
- Rubber band
- Fine strainer or coffee filter
- Clean glass bottle or jar with a nonreactive lid for storage
Before You Begin
Choose 100% grape juice with no potassium sorbate, sodium benzoate, sorbic acid, artificial sweeteners, or other preservatives that can interfere with fermentation.
Fresh-pressed grape juice is wonderful for this recipe, but pasteurized juice and juice from concentrate can also work as long as they are preservative-free. Dark purple or red grape juice will produce a deeper-colored vinegar, while white grape juice makes a lighter, milder version.
Instructions
- Check the grape juice with a hydrometer.
Before adding yeast, test the juice’s specific gravity. Aim for a reading between 1.045 and 1.060.
Many grape juices contain enough natural sugar to fall in this range already. If your juice reads below 1.045, dissolve 1 tablespoon of sugar in about ¼ cup of grape juice, stir it back into the jar, and test again. Repeat gradually until the juice reaches the target range.
Do not add water to thin the juice. If your grape juice reads above 1.060, simply let it ferment as it is.
- Add the yeast.
Pour the grape juice into a clean 64-ounce fermentation jar. Add the wine yeast and optional yeast nutrient. Attach the fermentation lid and airlock. - Ferment the juice into grape wine.
Keep the jar in a dark place around 65°F to 75°F. Fermentation may begin within a day or two, although a quiet airlock does not necessarily mean that nothing is happening.
After about 7 days, begin checking the specific gravity. The alcohol stage is finished when the reading stays stable for 2–3 days, the juice is no longer sweet, and the reading is near 1.000. This usually takes 1–3 weeks.
Begin the vinegar stage.
Once the grape juice has fermented into a young grape wine, remove the airlock. If there is a heavy layer of sediment at the bottom, strain the wine into a clean wide-mouth jar.
- Stir in the raw vinegar with active mother. Cover the jar with a coffee filter or clean cloth and secure it with a rubber band.
- Give the vinegar time and oxygen.
Keep the jar in a dark place around 65°F to 80°F. Do not seal it with a regular lid; the vinegar bacteria need oxygen to turn the alcohol into vinegar. - Give the liquid a gentle stir with a clean nonmetal utensil every day or two during the first week. If a new vinegar mother forms on top, leave it alone rather than breaking it up.
Notes
- If you want a more colorful vinegar, allow crushed dark grapes to ferment with their skins for 3 to 5 days before pressing and moving the liquid into the airlocked fermentation vessel. Stir the floating skins back down twice daily during that brief stage. (extension.uga.edu)
- I would use whole grapes, juice, or wine for this recipe—not leftover grape pomace. Pomace can make a thin, overly tannic, and less dependable vinegar.
- Do not use homemade grape vinegar for shelf-stable pickles or canning.
Health Notes: The Grape Version
Grapes contain plant compounds called polyphenols, particularly in their skins. Those compounds are widely studied in grapes, grape juice, and wine, but homemade grape vinegar should still be thought of as a culinary ingredient first. It brings acidity and complexity to food, not a prescription pad. (ars.usda.gov)
Cranberry-Orange Infused Vinegar Recipe
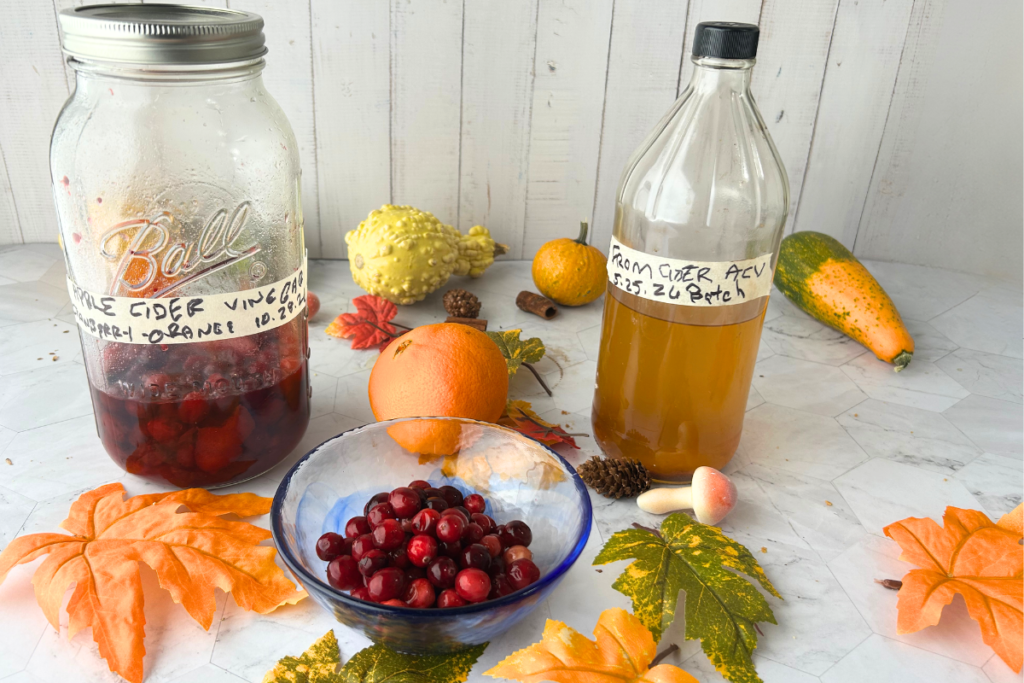
Cranberry-orange vinegar is where things get immediately festive.
I love this one because it has all the bright, tart, jewel-toned energy of cranberry sauce without requiring you to wait until the turkey is in the oven. You can make it with fresh or frozen cranberries, strips of orange peel, and a commercially produced vinegar with a known acidity level.
White wine vinegar makes a lovely base if you want the cranberry color to really show off. Apple cider vinegar gives the finished infusion a warmer, rounder personality. Either way, use a clean glass jar, cover the fruit with vinegar, and let it steep in a cool, dark place until the flavor is where you want it. Fruit-infused vinegars generally need at least 10 days to develop and often reach their best flavor in about three to four weeks.
Please avoid the thick white pith under the orange peel unless you enjoy bitterness with your holiday cheer. A vegetable peeler makes quick work of removing just the colorful zest.
Use cranberry-orange vinegar in:
- A vinaigrette for greens, goat cheese, pecans, and roasted squash
- Homemade cranberry sauce
- A maple-cranberry glaze for roasted carrots or Brussels sprouts
- A shrub with sparkling water and a little maple syrup
- A simple hostess gift, bottled and labeled with a ribbon
Cranberry-Orange Infused Vinegar
Makes: Makes about 1 pint strained vinegar.
Active time: 10 minutes
Total time: 2–4 weeks
This is the bright, ruby-red Thanksgiving vinegar. Use it for vinaigrettes, cranberry sauce, roasted carrots, Brussels sprouts, shrubs, and holiday mocktails.
Container
Use a clean, sterilized 64-ounce glass mason jar
Ingredients
- 2 cups fresh or frozen cranberries
- Peel from 1 orange, removed in wide strips with a vegetable peeler
- 2 cups commercially produced white wine vinegar or apple cider vinegar, labeled 5% acidity
- Optional: 1 small cinnamon stick or 4 whole black peppercorns
Instructions
Wash the cranberries and orange well. If using frozen cranberries, there is no need to thaw them first.
Lightly crush the cranberries with a potato masher or the bottom of a sturdy glass. You want to split some of the berries, not turn them into cranberry sauce.
Use a vegetable peeler to remove only the orange-colored zest. Avoid adding much of the white pith, which can turn bitter.
Place the cranberries, orange peel, and optional cinnamon or peppercorns in a clean pint jar.
Pour the vinegar over the fruit, making sure everything is submerged. Leave about ½ inch of headspace, then cap with a nonreactive lid.
Store in the refrigerator or another cool, dark place for 2 to 4 weeks. Begin tasting after 10 days.
When the vinegar tastes bright and cranberry-forward, strain it through a coffee filter or damp cheesecloth until clear. Pour into a clean bottle, label it, and refrigerate.
Use cranberry-orange vinegar within 4 to 6 months for the best flavor. If it becomes moldy, bubbly, cloudy, or slimy, discard it without tasting. (extension.oregonstate.edu)
Health Notes: Keep It Realistic
Cranberries contain compounds that have been studied for their possible role in reducing recurrent urinary tract infections in some people. But cranberry products are not a treatment for an active UTI, and cranberry-orange vinegar should not be marketed that way. In this recipe, cranberries are here because they taste fantastic and turn vinegar an almost ridiculous shade of ruby red. That is enough.
Pomegranate Infused Vinegar Recipe
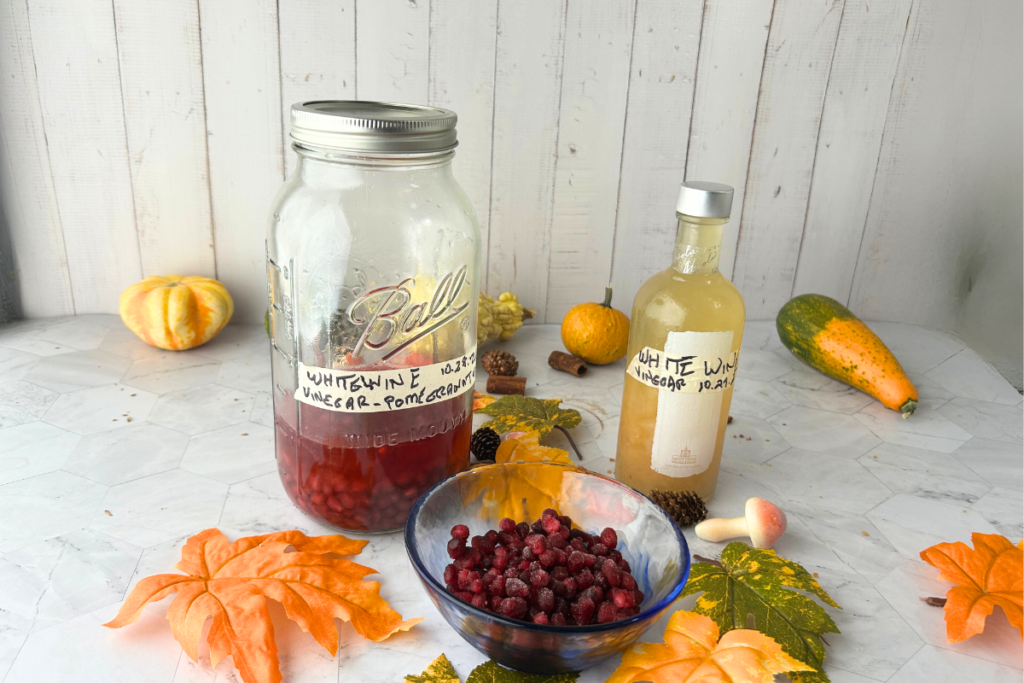
Pomegranate vinegar looks and tastes like something you would find in an expensive specialty-food shop, which is part of why I like making it at home.
The arils give the vinegar a tart, fruity flavor and a gorgeous red blush. It is especially nice for holiday salads because it cuts through rich ingredients like cheese, nuts, roasted squash, and buttery vegetables without bulldozing everything else on the plate.
Use pomegranate arils with white wine vinegar, champagne vinegar, or rice vinegar for a gentler flavor. Let the infusion steep, strain it well, and store it in the refrigerator for best color and freshness.
Try pomegranate vinegar in:
- Spinach salad with feta, pistachios, and sliced pears
- A glaze for roasted sweet potatoes
- A pan sauce for chicken, duck, or pork
- Sparkling water with a spoonful of honey or maple syrup
- A vinaigrette with olive oil, Dijon, and minced shallot
Pomegranate Infused Vinegar
Makes: Makes about 1 pint strained vinegar.
Active time: 15 minutes
Total time: 2–4 weeks
Pomegranate vinegar is tart, jewel-toned, and just fancy enough to make an ordinary salad feel like it should have its own holiday playlist.
Container
Use a clean and sterilized 1-quart glass jar.
Ingredients
- 2 cups pomegranate arils
- 2 cups commercially produced white wine vinegar, champagne vinegar, or apple cider vinegar, labeled 5% acidity
- Optional: 1 strip orange peel, 1 small cinnamon stick, or 5 black peppercorns
Instructions
- Wash and dry a pint jar, lid, and utensils well.
- Add the pomegranate arils and any optional flavoring to the jar.
- Pour the vinegar over the arils, making sure they are fully covered. Leave about ½ inch of headspace and seal with a nonreactive lid.
- Refrigerate or store in a cool, dark place for 2 to 4 weeks. Gently turn the jar every few days if you think of it—no need to shake it like a cocktail.
- Begin tasting after 10 days. Once the vinegar is tart, fruity, and pleasantly pomegranate-forward, strain it through cheesecloth or a coffee filter.
- Bottle the strained vinegar in a clean jar, label it with the date, and refrigerate.
Pairing Notes
Pomegranate vinegar is especially good with spinach salads, feta, pistachios, roasted sweet potatoes, duck, pork, and sparkling-water shrubs. For a softer flavor, use champagne vinegar; for a warmer, more autumnal result, use apple cider vinegar.
Health Notes: A Little Pomegranate Perspective
Pomegranates are rich in polyphenols, including ellagitannins, which are compounds researchers continue to study for possible health effects. But the amount transferred into a homemade vinegar varies, and it is not a reason to make big health promises about the finished bottle. I think “delicious on roasted sweet potatoes” is already a very respectable achievement.
Storage and Safety for Homemade Fruit Vinegar
For cranberry-orange and pomegranate infusions, start with commercial vinegar labeled at least 5% acidity. Use clean jars and utensils, strain out the fruit once the flavor is right, and store the finished infusion in the refrigerator for the best freshness and flavor. If you see mold, bubbling, cloudiness, or sliminess, discard it without tasting.
And my usual friendly vinegar reminder: homemade and infused vinegars are wonderful for salads, sauces, marinades, shrubs, and refrigerator pickles, but they should not be used as the vinegar in shelf-stable canning recipes unless their acidity has been professionally tested. For canning and pickling, use commercial vinegar labeled 5% acidity.
Fall Vinegar Does Not Begin and End with Apples
Apple cider vinegar deserves its place in the fall pantry. But pear vinegar, grape vinegar, cranberry-orange vinegar, and pomegranate vinegar give you more ways to preserve the season—and more reasons to reach for vinegar when the holiday cooking begins.
Make a slow fermented vinegar if you are in the mood for a longer kitchen project. Make an infusion if you want something beautiful and useful before Thanksgiving. Or make both, because there is no rule saying your pantry cannot have a little too much interesting vinegar.
Frankly, there are worse problems to have.
Fall Fruit Vinegar FAQs
Is fruit vinegar the same as fruit-infused vinegar?
No. True fruit vinegar begins with fruit sugars that ferment into alcohol, then the alcohol ferments into vinegar. Fruit-infused vinegar begins with finished commercial vinegar and steeps with fruit, citrus peel, herbs, or spices. In this post, pear and grape are true fermented vinegars, while cranberry-orange and pomegranate are infusions.
Can I make pear or grape vinegar with store-bought juice?
Yes. Choose 100% pear juice or grape juice without preservatives such as potassium sorbate or sodium benzoate. Pear nectar is not the same as pear juice; it is usually thicker and may contain puree, water, sweeteners, or stabilizers. For the most predictable fermentation, use juice and wine yeast rather than relying on wild yeast.
Can I use homemade fruit vinegar for canning or shelf-stable pickles?
No. Use homemade fruit vinegar for salad dressings, sauces, marinades, shrubs, and refrigerator pickles. For shelf-stable canning or pickling, use commercially produced vinegar labeled at least 5% acidity and follow a tested preservation recipe. Homemade vinegar acidity can vary and should not be substituted in canning recipes.